In this post I will describe how you can crack a KeePass Database file (.kdbx) in an easy way. Or to be correct we are not cracking the DB, we are cracking the password hash.
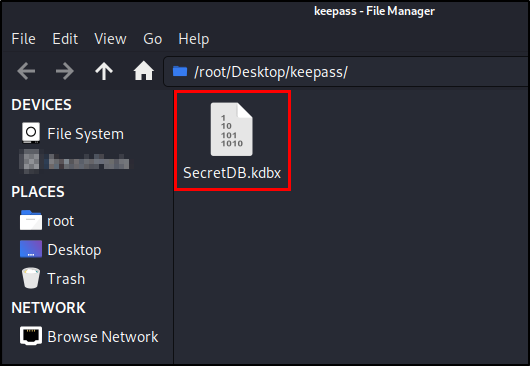
To demonstrate this I created a new database that I called “SecretDB.kdbx” and our mission will be to find out which master password I chose for the database.
To be able to crack the hash we will need to extract and save it and that can be done with the John the ripper utility tool “keepass2john“. It comes with Kali Linux so you don’t have to install it.
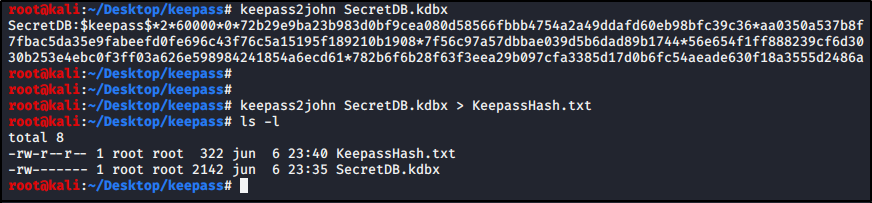
What you do to extract the hash is really simple, you just run: keepass2john SecretDB.kdbx
You can also send the output to a file by adding “>” like I did in the screenshot below.
keepass2john SecretDB.kdbx > Keepasshash.txt
We now have our hash ready to be cracked. In this example we will try to crack it using a dictionary and John the ripper. I used a modified version of rockyou.txt as dictionary. You can also use other great cracking tools like hashcat but I went with john here.
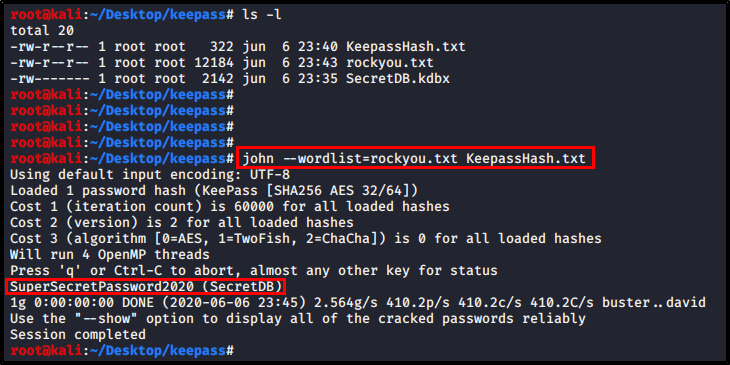
We run john and specify our custom wordlist with “–wordlist” parameter and then define our hash file.
john --wordlist=rockyou.txt KeepassHash.txt
We then just let it run for some time and as soon as we crack the hash it will be displayed. As you can see in the screenshot we did crack the hash and the password of this SecretDB.kdbx-database was “SuperSecretPassword2020”.
I hope you found this post useful and make sure to not use weak password for your database.
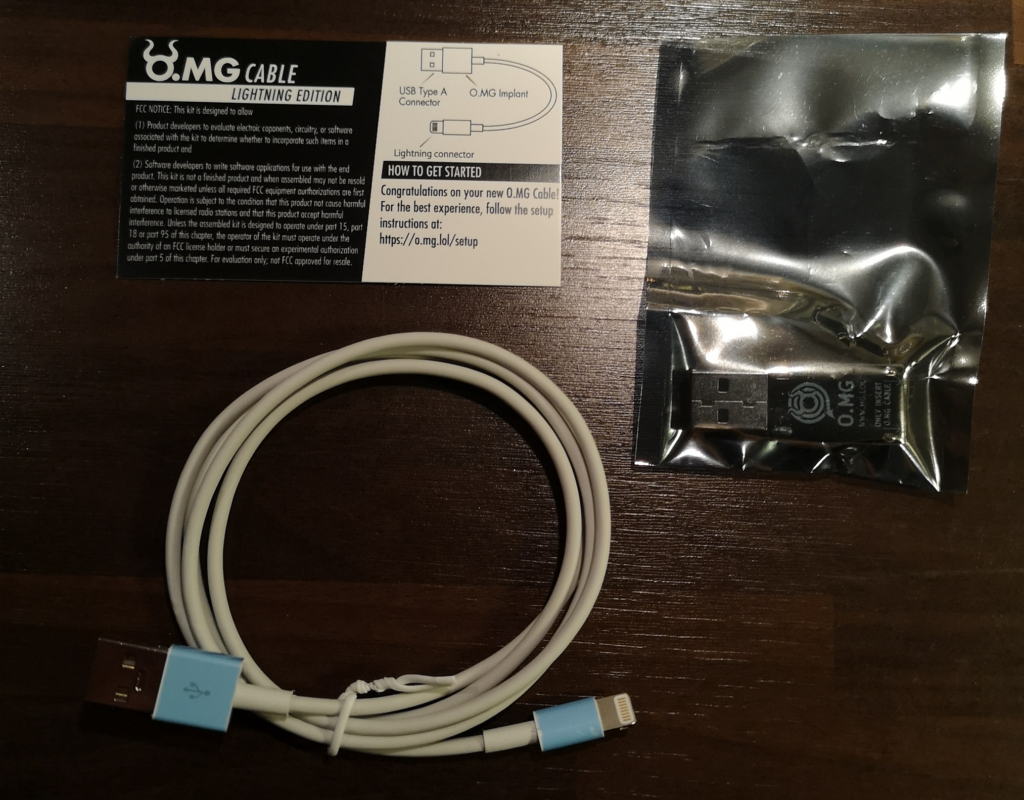
This guide will help you get started with the O.MG-cable. When you open your package it should include three things:
A card with instructions
The programmer
The OMG-cable
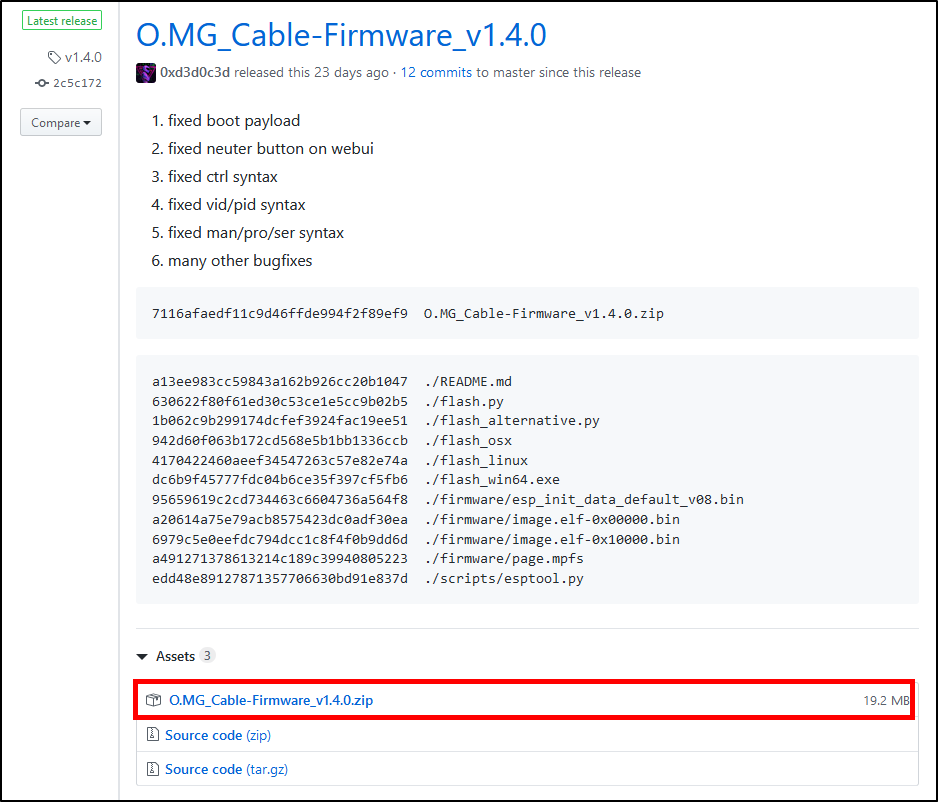
If you read the instruction card you will see that you can find instructions on how to get started at https://o.mg.lol/setup. You will there find a link to the Github project where you can download the latest firmware that we will use to flash the cable.
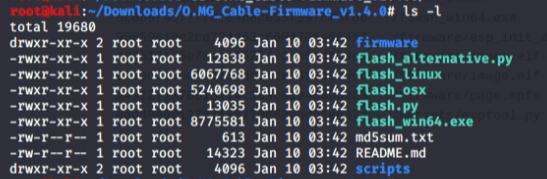
Download the firmware by clicking on the link to the .zip-file. You will then need to unzip the file and you can do that by navigating to your download folder and run: unzipO.MG_cable-Firmware_v1.4.0.zip
Then move into the new folder and you will see the following files.
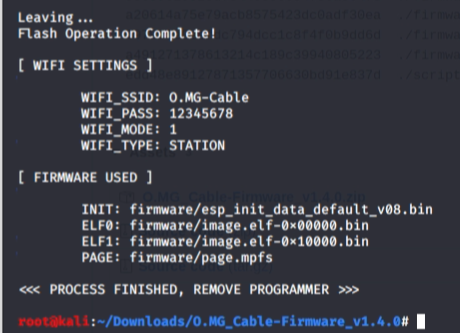
The next step is to plug in the programmer in your computer and then plug in the cable into the programmer. You are now ready to flash your cable and you do that by running the flash_linux:
./flash_linux
You will be able to either program it into Station or Access Point mode. In this case just go by default (AP mode) by pressing Enter. When the flashing is done you are ready to use the cable.
Disconnect the programmer from your computer and plug in your cable. Wait for ~60 seconds and then connect to the cable via WiFi with the default credentials above. When you are connected to the cables wireless network you can open a web browser and browse to http://192.168.4.1 and you will get to the UI.
Now you are ready to run your first scripts. Good luck!
Yesterday a new version of Kali Linux were released, Kali 2020.1. You can download it here. Make sure that you have read the release notes to make sure that you don’t break anything you don’t want.
Upgrade your existing machine:
Run sudo apt full-upgrade -y
Wait for the job to finish.
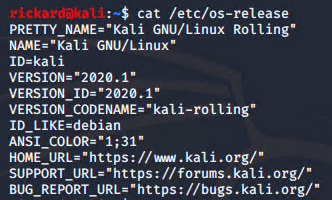
Verify that you got the new version by running cat /etc/os-release
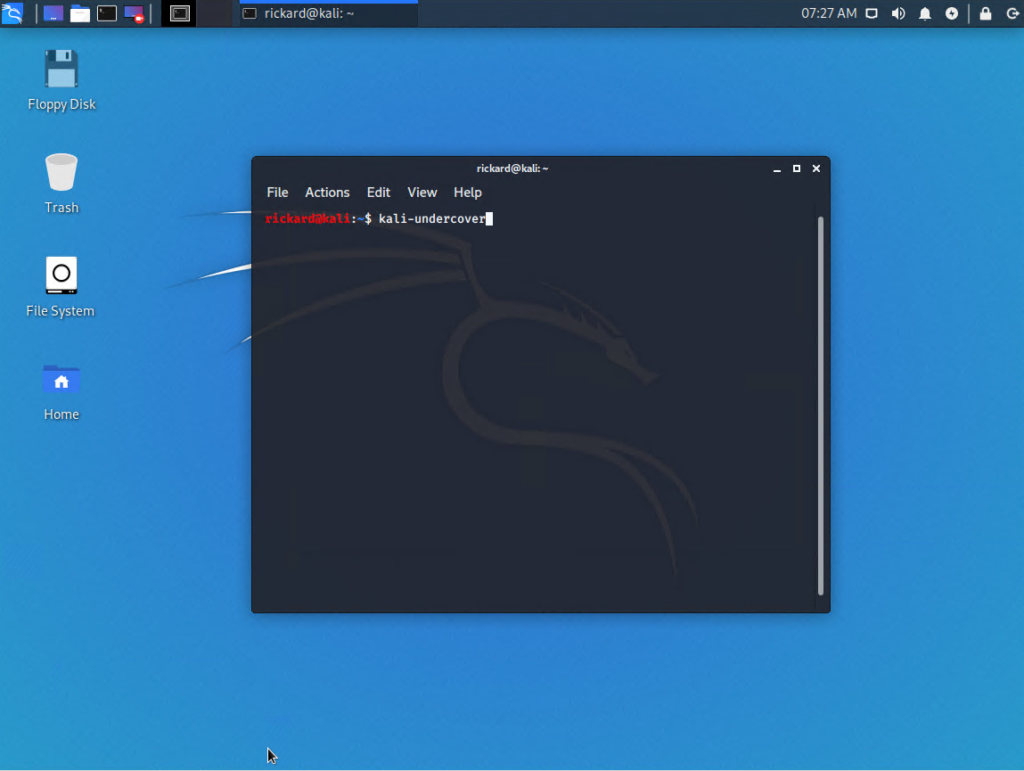
How to use undercover mode in Kali Linux 2020.1: Undercover mode is a new feature for version 2020.1 that will help you hide that you are a super elite hacker when you are out in public by temporarily changing the desktop to look like a Windows 10 machine. I’m not sure I see the real use cases for this but it’s actually a funny feature. To use it you just need to run kali-undercover.
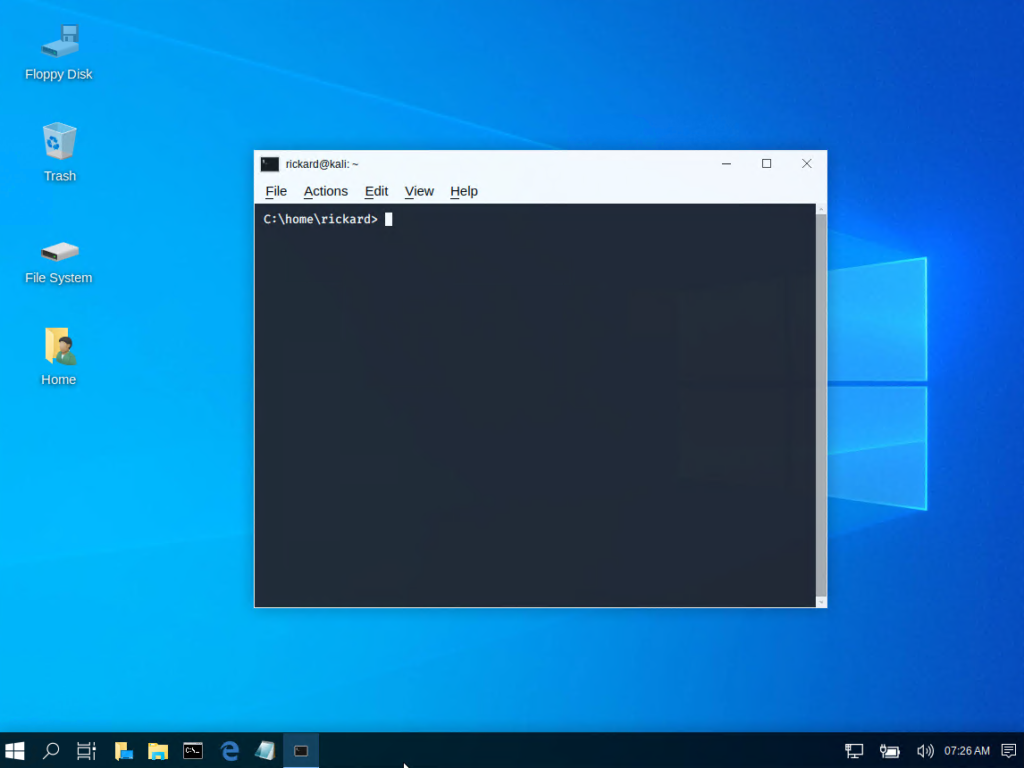
After a few seconds you will see a Windows 10-like appearance, pretty cool.
Golang (Go) is a programming language that are becoming more and more popular and I have seen many interesting tools that are written in Go. Since Go are not being installed by default in Kali Linux I thought that publishing a quick-start guide could be a good idea.
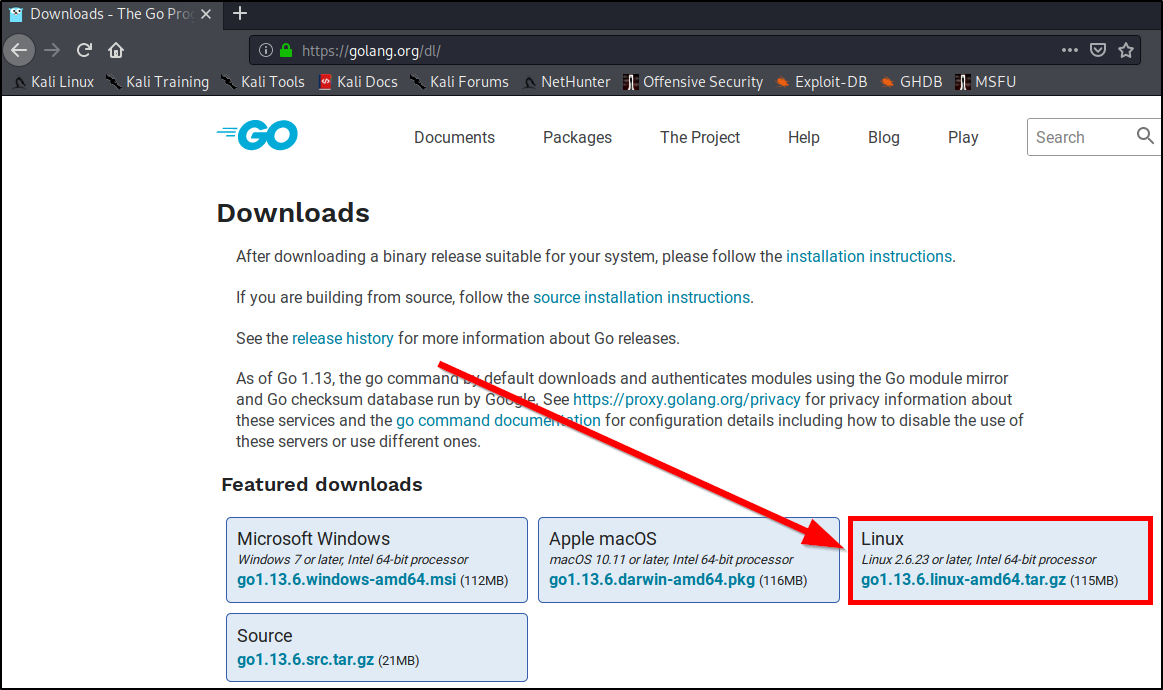
Download the latest version for Linux – “gox.xx.x.linux-amd64.tar.gz”
Open your terminal and navigate to your downloads folder cd /root/Downloads
Extract the files tar -C /usr/local/ -xzf go1.13.6.linux-amd64.tar.gz
Add variables for GO by modifying “~/.bashrc” vim ~/.bashrc Add the following paths to the end of the file export GOPATH=/root/go-workspace export GOROOT=/usr/local/go PATH=$PATH:$GOROOT/bin/:$GOPATH/bin
Now we need to refresh the bashrc to get the updated variables source ~/.bashrc
Now we just need to verify that everything is correct configured and we can do that by creating a simple ‘hello world’ program in Go. vim helloworld.go Add the following code to the file: package main import "fmt" func main() { fmt.Printf("Hello world!\n") } Then save the file and try to run the program: go run helloworld.go If everything was configured correctly you should see something like this: You are now ready to use Golang on your Kali Linux machine!
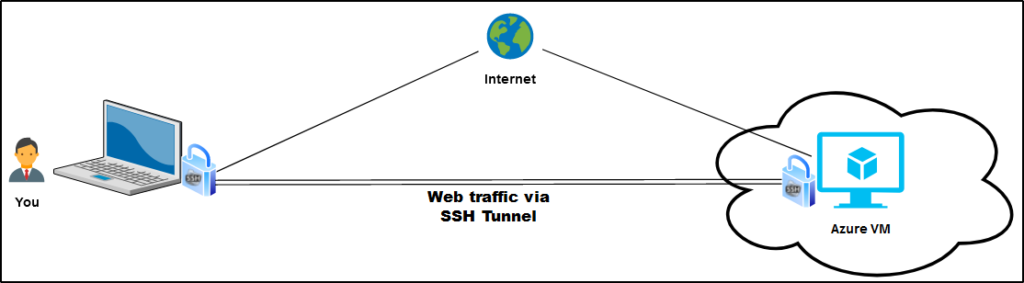
Have you just created your first Azure VM and are looking for a good, secure way to connect to you new machine without exposing more than necessary to the internet? Maybe you just want to run a few machines and don’t want to spend money on firewalls to configure VPN to your Azure Virtual Network (VNET)?
In this post I will explain a method that can be used to connect to your machine securely without any cost. After reading this post you will know how you can set up a SSH tunnel to your machine so you only need to expose TCP port 22 to the internet. I will also show you how you can limit the access to that port by configuring a Network Security Group (NSG) in Microsoft Azure to only allow your own IP to connect. You will connect to the VM using Putty and either Google Chrome or Mozilla Firefox. We start off by configuring the NSG in Azure.
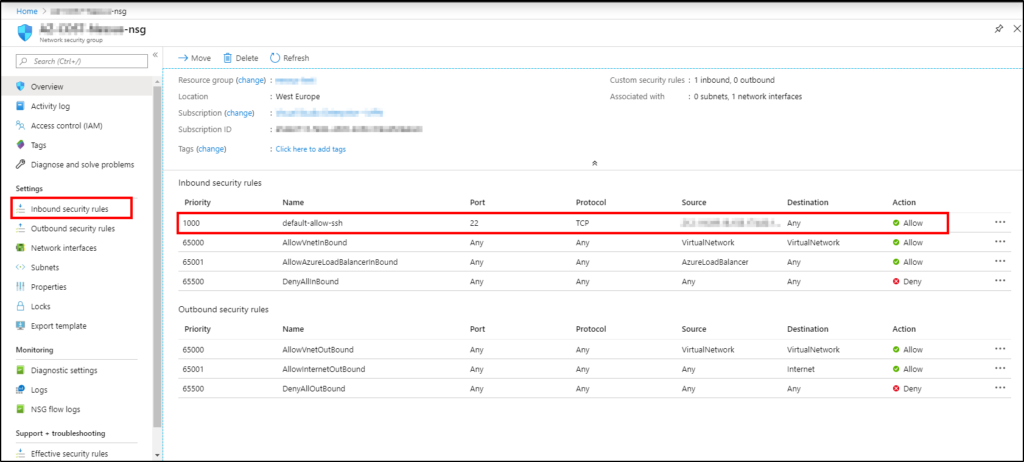
Configuring NSG in Azure: The first thing that we need to do is to allow you to SSH to your machine and we do that by configuring the NSG. You want to modify the inbound security rule named ‘default-allow-ssh’ and you do that by clicking on ‘Inbound security rules’ in the left menu.
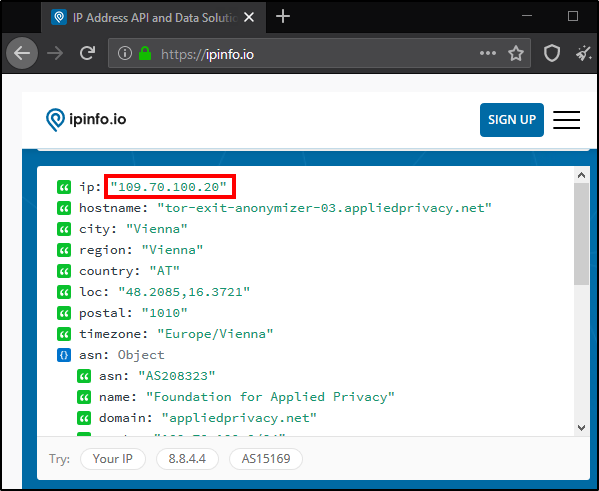
You should now add your public IP to the rule to allow you to connect from your home network. You probably know how to get your public IP but if you don’t know, one simple way is by visiting https://ipinfo.io and copy the address from there.
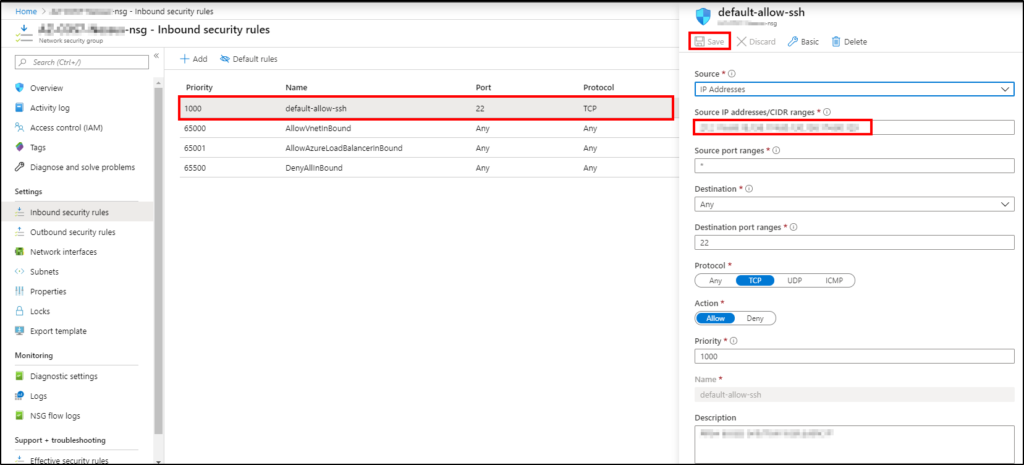
When you have the IP ready, click on the ‘default-allow-ssh’-rule to expand it and then add your IP to ‘Source IP addresses/CIDR ranges’ and press ‘Save’.
The Azure configuration is now done. Lets move on to the Putty configuration.
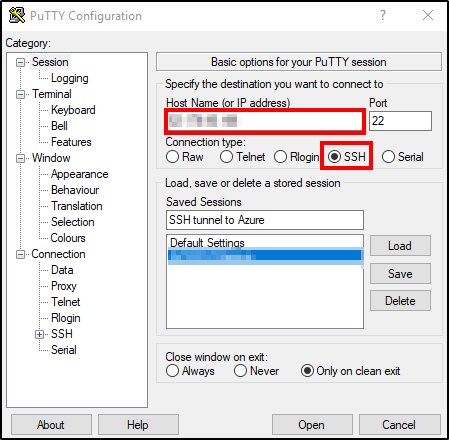
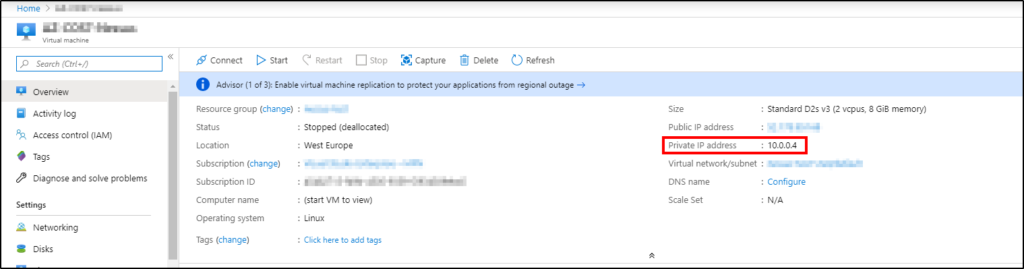
Configuring Putty: If you don’t have Putty installed you can download it from the official website and then just install it. After you have installed the software the first step is to run Putty and add the public IP of your Azure VM and select SSH port 22.
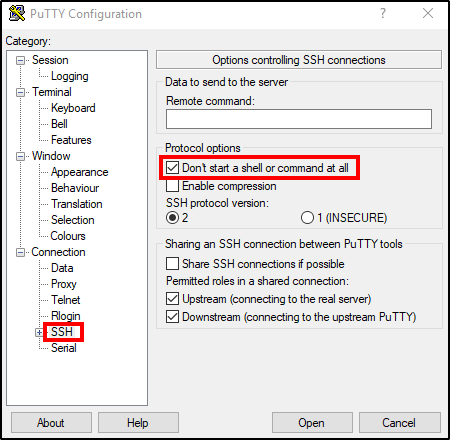
Then navigate to SSH and check ‘Don’t start a shell or command at all’.
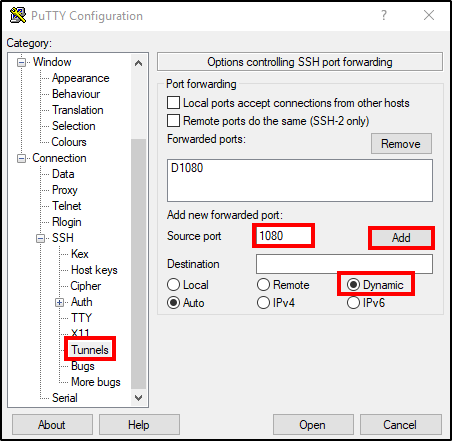
Move on by expanding SSH (+) and go to Tunnels. Add a forwarded port by choosing ‘Source port’. In this example we use port 1080. Select ‘Dynamic’ for destination and then press ‘Add’. Now you should see ‘D1080’ added above.
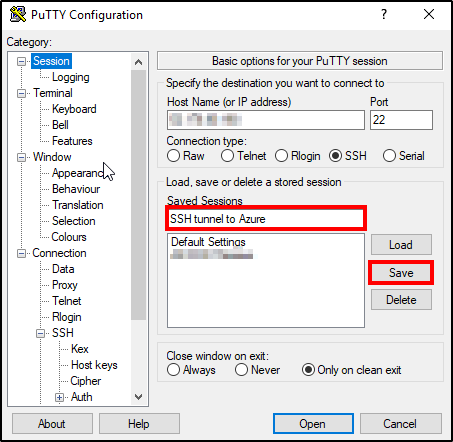
If you don’t want to configure these settings every time you want to use the tunnel you can save the session. That is done by going back to ‘Session’ and enter a name and then press ‘Save’.
Now the tunnel is ready and we just need to start it. Click on ‘Open’, enter your SSH credentials and press enter and the tunnel should be up and running.
Verify that the tunnel works: You will probably want to make sure that the tunnel works as expected and we can verify that by configuring a simple HTTP server on the VM. In this example CentOS7 was used but it can be done on most machines.
Step one is to open another putty window and connect to you VM via SSH. Navigate to your home folder (cd /home) and create a directory (mkdir testfolder). Cd into that folder and create a testfile (touch text.txt). Then run the following command to run a python based HTTP-server on port 80.
sudo python -m SimpleHTTPServer 80
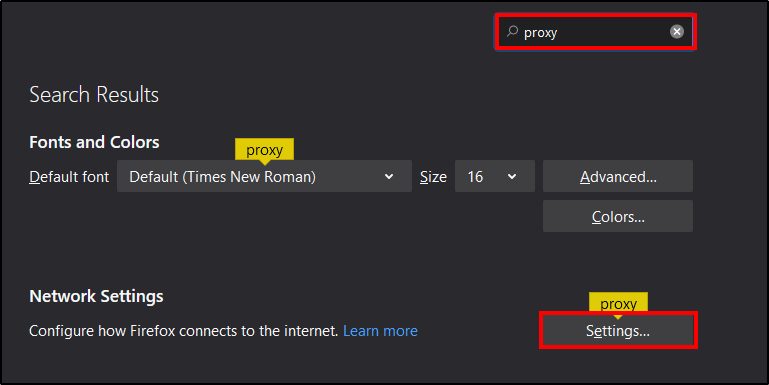
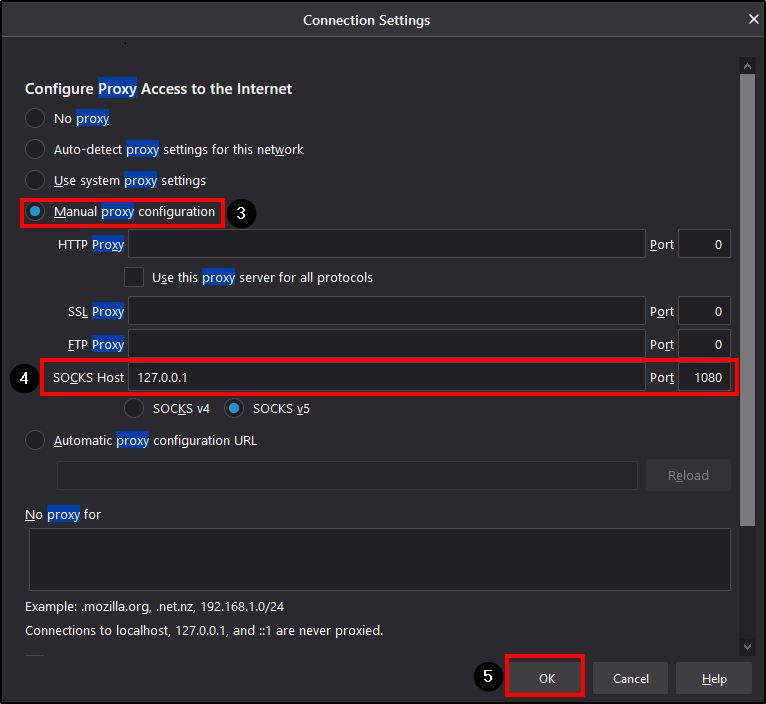
Your server will now listen for incoming connections on port 80. But since you don’t allow any connections to port 80 in the NSG you won’t be able to go directly to port 80. We need to send our HTTP traffic in the SSH tunnel to be able to reach it and we do that by configuring proxy settings in our web browser. This can be done in most of the common browsers and I will show you how to do it in Firefox and Chrome.
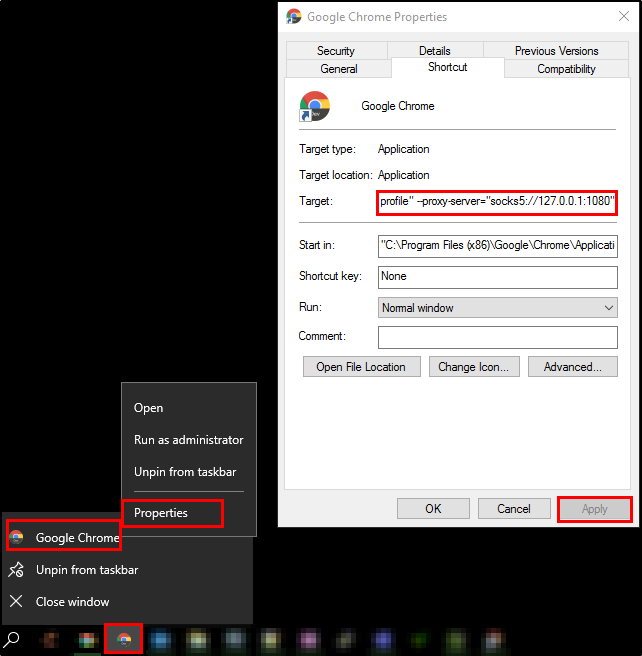
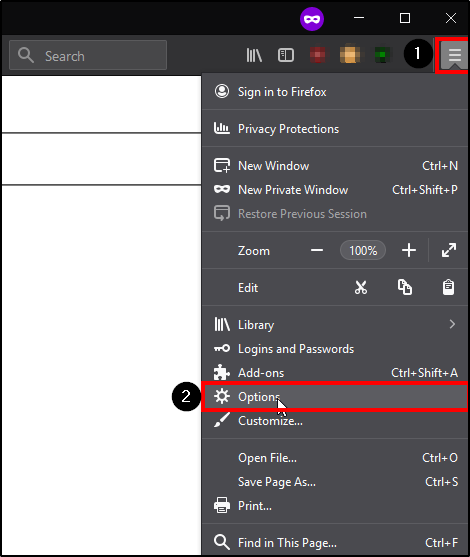
Chrome: To configure proxy for Chrome you just right click on Chrome in the task bar and select ‘Properties’. You then need to add some run parameters.