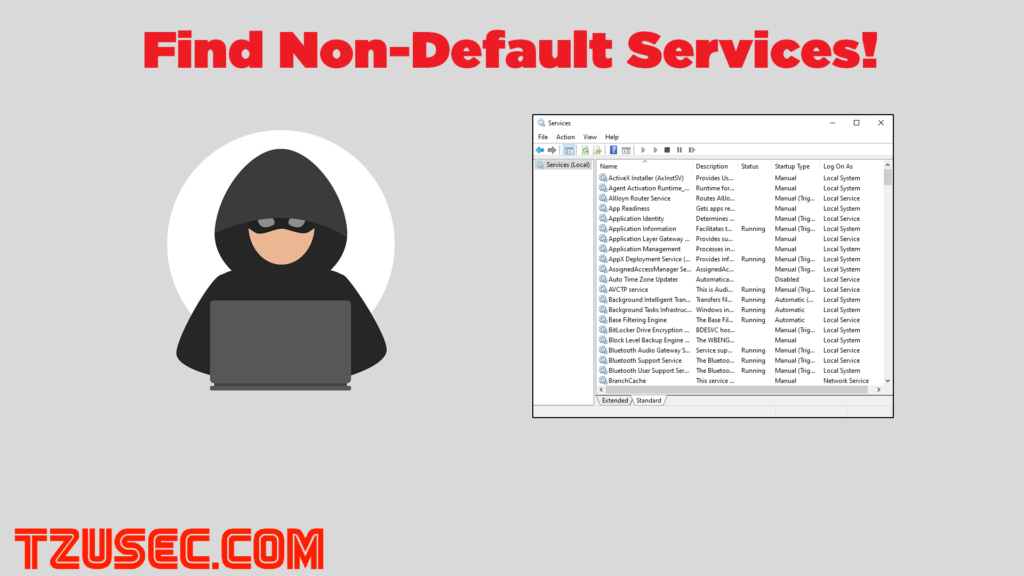
I just released a new video on Youtube where I show you how to use my new Powershell script for getting a list of all services that run on your windows machine that are not default services. You probably won’t need a video instruction on how to run a simple Powershell script but I’m sure it can help someone who is not so familiar with scripts.
The script is not something fancy, just a simple script that will list all non-default services and show you the info you might want to know.
I just released a new video on my Youtube channel. The video will show you some things that can be done with a BadUSB.
A BadUSB is a device that simulates a HID in form of a keyboard and takes advantage of that the majority of today’s computers blindly trusts all USB-devices. The computer thinks that the device we plug in is a keyboard and that means that anything you we can do with a keyboard we can do with this device, but execute the payloads way faster.
There are many different versions of BadUSB. You can create your own using an arduino board or buy one from Hak5 or Maltronics. In the video I used a Malduino Elite.
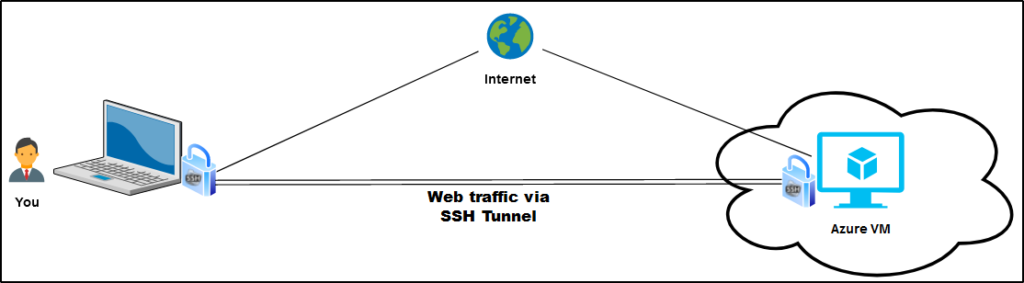
Have you just created your first Azure VM and are looking for a good, secure way to connect to you new machine without exposing more than necessary to the internet? Maybe you just want to run a few machines and don’t want to spend money on firewalls to configure VPN to your Azure Virtual Network (VNET)?
In this post I will explain a method that can be used to connect to your machine securely without any cost. After reading this post you will know how you can set up a SSH tunnel to your machine so you only need to expose TCP port 22 to the internet. I will also show you how you can limit the access to that port by configuring a Network Security Group (NSG) in Microsoft Azure to only allow your own IP to connect. You will connect to the VM using Putty and either Google Chrome or Mozilla Firefox. We start off by configuring the NSG in Azure.
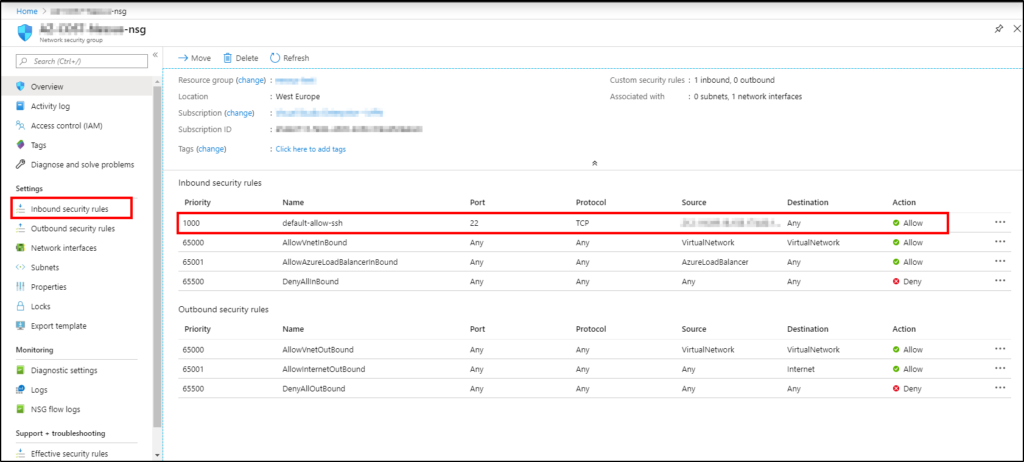
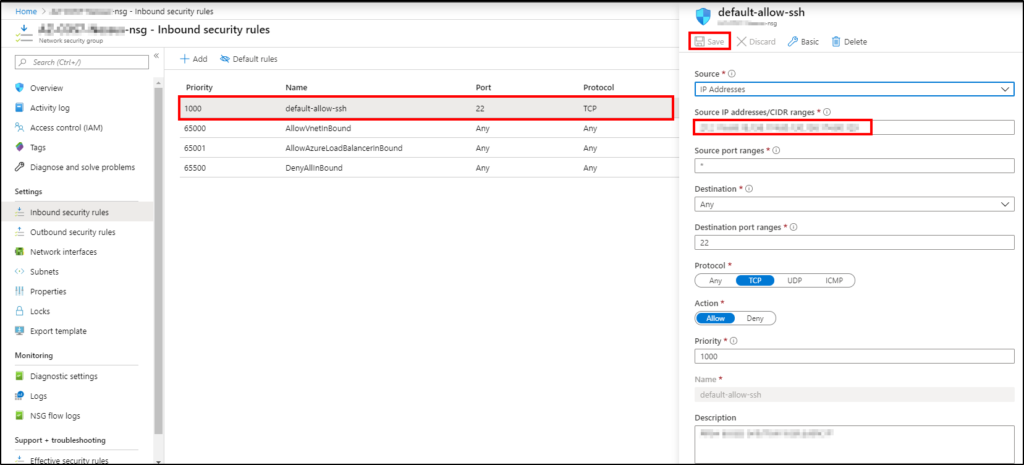
Configuring NSG in Azure: The first thing that we need to do is to allow you to SSH to your machine and we do that by configuring the NSG. You want to modify the inbound security rule named ‘default-allow-ssh’ and you do that by clicking on ‘Inbound security rules’ in the left menu.
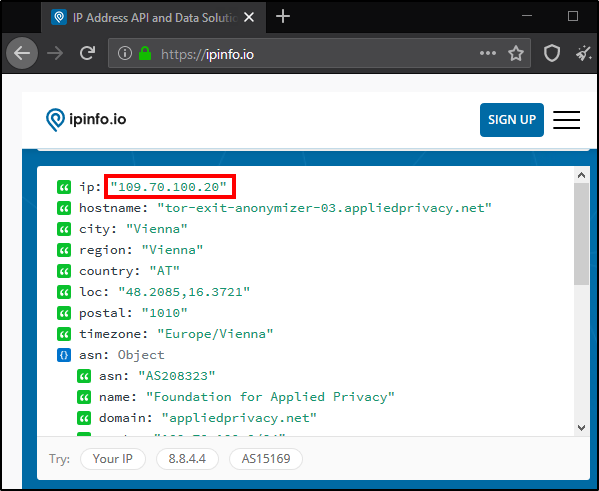
You should now add your public IP to the rule to allow you to connect from your home network. You probably know how to get your public IP but if you don’t know, one simple way is by visiting https://ipinfo.io and copy the address from there.
When you have the IP ready, click on the ‘default-allow-ssh’-rule to expand it and then add your IP to ‘Source IP addresses/CIDR ranges’ and press ‘Save’.
The Azure configuration is now done. Lets move on to the Putty configuration.
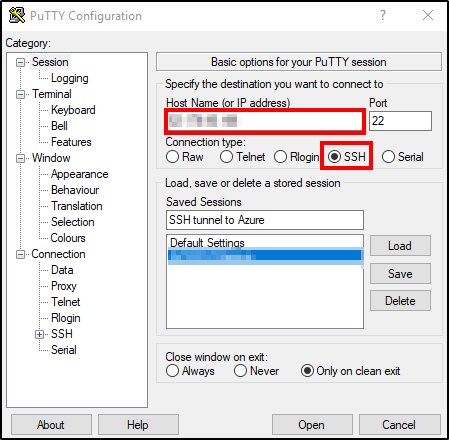
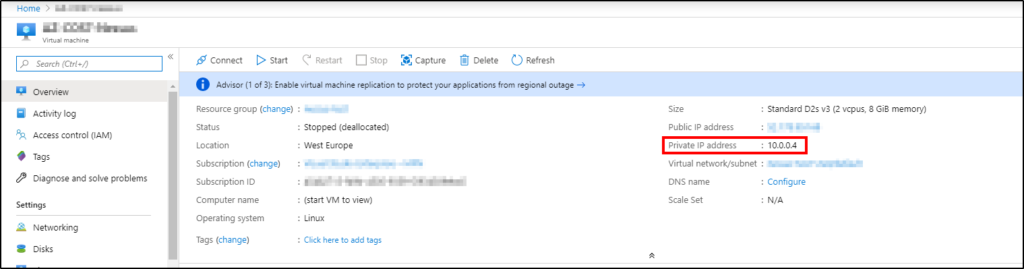
Configuring Putty: If you don’t have Putty installed you can download it from the official website and then just install it. After you have installed the software the first step is to run Putty and add the public IP of your Azure VM and select SSH port 22.
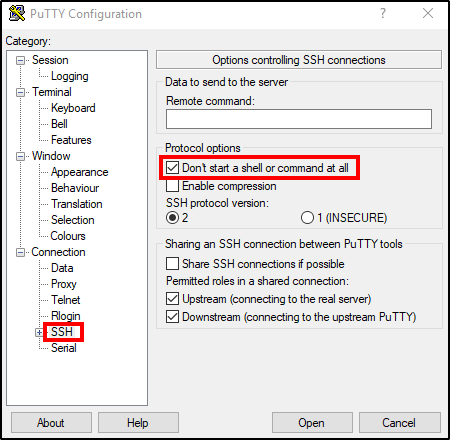
Then navigate to SSH and check ‘Don’t start a shell or command at all’.
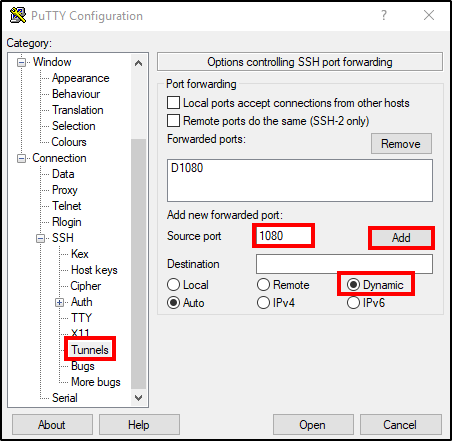
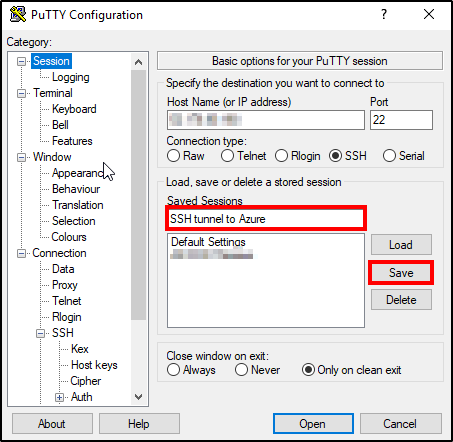
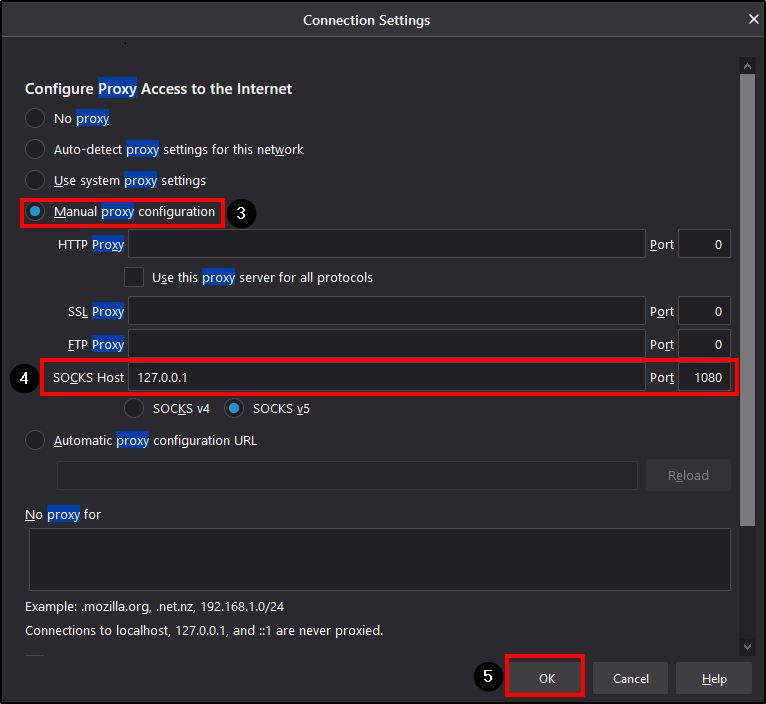
Move on by expanding SSH (+) and go to Tunnels. Add a forwarded port by choosing ‘Source port’. In this example we use port 1080. Select ‘Dynamic’ for destination and then press ‘Add’. Now you should see ‘D1080’ added above.
If you don’t want to configure these settings every time you want to use the tunnel you can save the session. That is done by going back to ‘Session’ and enter a name and then press ‘Save’.
Now the tunnel is ready and we just need to start it. Click on ‘Open’, enter your SSH credentials and press enter and the tunnel should be up and running.
Verify that the tunnel works: You will probably want to make sure that the tunnel works as expected and we can verify that by configuring a simple HTTP server on the VM. In this example CentOS7 was used but it can be done on most machines.
Step one is to open another putty window and connect to you VM via SSH. Navigate to your home folder (cd /home) and create a directory (mkdir testfolder). Cd into that folder and create a testfile (touch text.txt). Then run the following command to run a python based HTTP-server on port 80.
sudo python -m SimpleHTTPServer 80
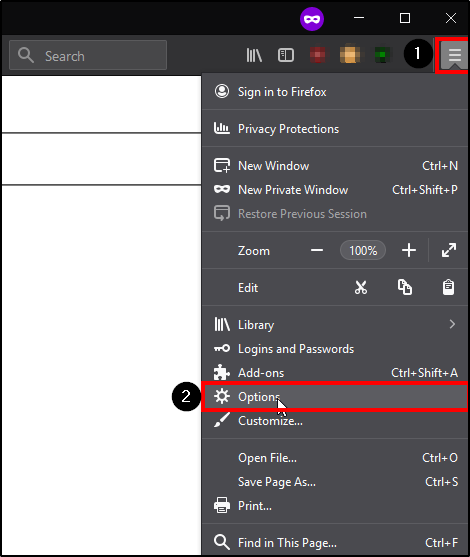
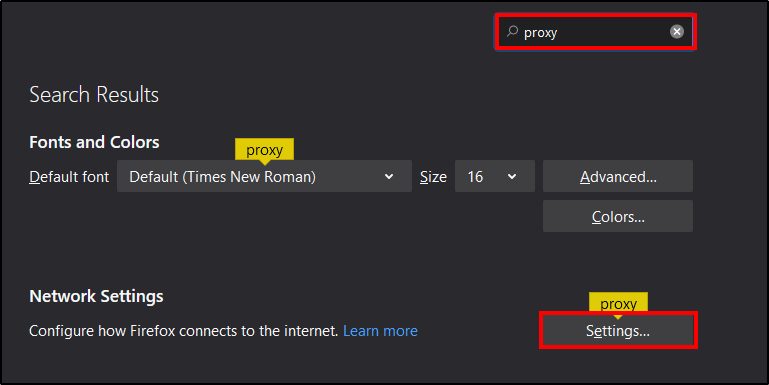
Your server will now listen for incoming connections on port 80. But since you don’t allow any connections to port 80 in the NSG you won’t be able to go directly to port 80. We need to send our HTTP traffic in the SSH tunnel to be able to reach it and we do that by configuring proxy settings in our web browser. This can be done in most of the common browsers and I will show you how to do it in Firefox and Chrome.
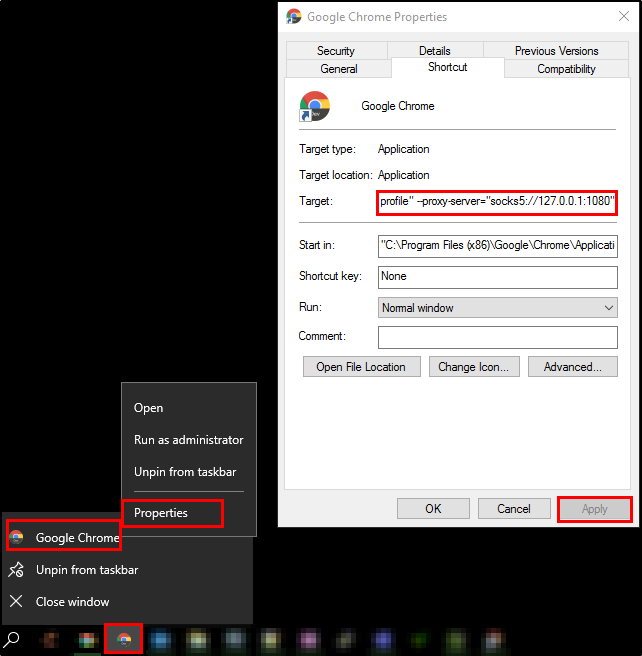
Chrome: To configure proxy for Chrome you just right click on Chrome in the task bar and select ‘Properties’. You then need to add some run parameters.