What is DKIM and how do you enable IT in Microsoft 365?

What is DKIM?

DKIM stands for DomainKeys Identified Mail and is an email autentication method. It helps the receiving mail server to verify whether an email have been sent from an allowed email server or not.

The idea of DKIM is that the senders email servers are signing all outgoing messages with asymmetric encryption. The receiving email servers can then easily verify the email signing with help of the senders public key that are being stored in the sending domains DNS.

If users would need to manually sign messages and manually verify all messages it would be a pain in the ass for them and no one would use it. Nowadays most modern email systems have built-in support for DKIM to make the process smooth and automated.

How to enable DKIM?

The implementation of DKIM is different for different vendors but the idea is the same. The senders generates a asymmetric key pair and signs all outgoing emails. The receiver of the email can use the senders public key to verify that the email were signed by the correct server. Microsofts email cloud service Exchange Online is very popular so I will now describe how you can enable DKIM signing in Microsoft 365.

Enable DKIM signing in Microsoft 365

Microsoft 365 have built-in support for DKIM signing. This guide will show you how easy it is to enable and configure.

  1. Step one is to browse and login to the following site: https://security.microsoft.com/dkimv2
  2. You will now see an overview of all of your accepted domains of your tenant, click on the domain you want to enable DKIM for:

  3. Press “Sign messages for this domain with DKIM signatures”
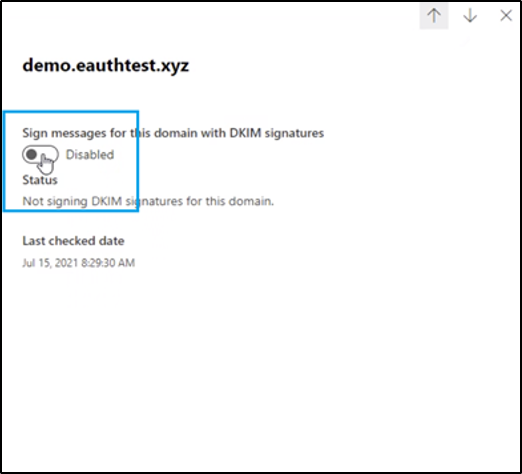
  4. You will now get a pop-up windows which instructs you to create two CNAME post in your DNS. Copy these instructions and login to your DNS provider
  5. Create and publish the two CNAME posts in you DNS based on the instructions, usually it is by the following format:
    1. Selector 1
      • Name: selector1._domainkey
      • Type: CNAME
      • Value: selector1-<customDomainIdentifier>._domainkey.<initialDomain>
        • Example: selector1-tzusec-com._domainkey.tzusec.onmicrosoft.com
      • TTL: 3600
    2. Selector 2
      • Name: selector2._domainkey
      • Type: CNAME
      • Value: selector2-<customDomainIdentifier>._domainkey.<initialDomain>
        • Example: selector2-tzusec-com._domainkey.tzusec.onmicrosoft.com
      • TTL: 3600
  6. When the post have been published go back to the DKIM page in Microsoft 365 and press “Sign messages for this domain with DKIM signatures” again.
  7. When Microsoft have verified that the CNAME posts are correct signing will be enabled and you have successfully enabled DKIM signing for all of your outgoing emails, great job!

The next step is to verify that the signing works correctly and you can do that manually by inspecting the headers of an email sent from the email server. I will describe how you can do that in a future blog. Feel free to contact me on twitter if you have any questions.

// Rickard Carlsson

What is SPF and how do you configure it?

What is SPF?

SPF stands for Sender Policy Framework and is an email autentication method. It helps the receiving mail server to verify whether an email have been sent from an allowed email server or not.

Your SPF policy is set up by publishing it in the form of a TXT record in your DNS. It works as an allow list for your domain and you declare where emails from your domain can originate from. Worth to mention is that this policy doesn’t prevent spoofed emails from being sent, but it allows receiving email servers to verify if the email was sent from a legit source.

How to configure SPF?

You configure SPF by adding a TXT record to your DNS. Begin your spf record by adding the protocol version and version 1 (spf1) is currently being used:
v=spf1

Then add the IP adresses or other SPF-record that you want to include. For example:

Add a specific IP address:
ip4:23.103.224.10
Or include another SPF-record, for example the record for Microsoft Exchange Online:
include:spf.protection.outlook.com

Lastly add the instruction to receiving email servers on how to act if the sender address is not included in your SPF-record. The most common way is to set it to “StrictFail” which means that you instruct the server to reject the email.
-all

So in this case the SPF record would look like this:

v=spf1 ip4:23.103.224.10 include:spf.protection.outlook.com -all

Verify your SPF-record

When you have created your SPF-record it’s a good idea to verify that everything looks good. There are many different ways to inspect your SPF-record, you can either use an online tool like mxtoolbox or dmarcadvisor or you can check it manually.

Verify with MXToolbox

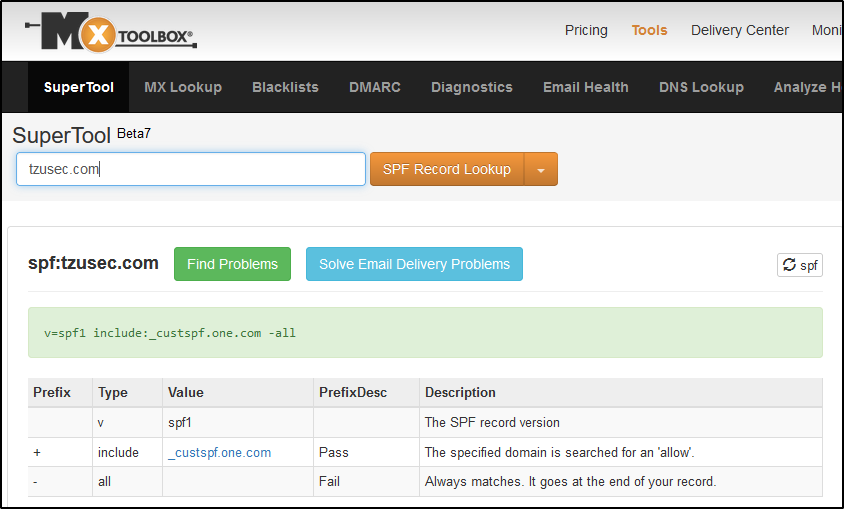
Open your browser and browse to https://mxtoolbox.com/SuperTool.aspx and enter the domain your want to inspect and then press “SPF Record Lookup”:

Screenshot from MXToolbox SuperTool

Verify with Dmarcadvisor

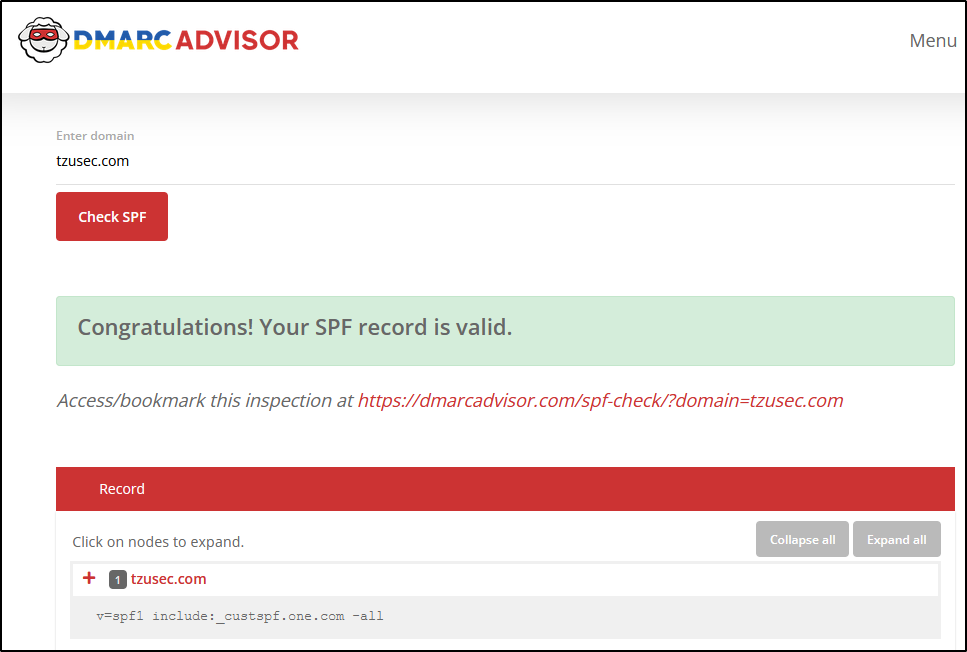
Open your browser and browse to https://dmarcadvisor.com/spf-check and enter the domain name your want to inspect and then press “Check SPF”:

Screenshot from DmarcAdvisor

Verify with Powershell (Windows)

Resolve-DnsName -Type TXT -Name tzusec.com

Verify using Linux

dig +short tzusec.com txt


// Rickard

Don’t get phished this holiday season

phishing during holiday season

Holiday season is coming closer and I would like to take this opportunity to discuss phishing since the amount of phishing attacks increases a lot during holiday season. According to Zscaler the amount of phishing attacks increased with 400% from October to November this year as Black Friday and Cyber Monday came closer.

Phishing, which is a type of social engineering, is based upon exploiting people’s feelings. During shopping-holidays like Black Friday and Cyber Monday but also during Christmas people are more vulnerable. Phishing campaigns are designed based on the holiday. During shopping holidays, it is very common with emails or texts that contains:

  • Fake Amazon Gift Cards.
  • Fake login portals to Paypal and other payment sites.
  • Scams related to other shopping or shipmen companies like Postnord or DHL.

During other holidays like Christmas and Easter it’s more common with greetings with bad URLs included. It can for example be a Merry Christmas email with a link to malicious site. It is also common with emails where the sender wishes you a merry Christmas and tells you that they have donated money to charity and that you can click on the link to read more. When people get these kinds of emails and like what they read they have already lowered the guard and it’s much more likely they will click on a unknown malicious link.

It’s crucial to always be vigilant and know how to distinguish phishing emails from legitimate ones, especially since 94% of all malware are delivered via email according to Verizon. I came across a poster from LogRythm a few years ago with a top ten list for how to spot and handle a phishing email and it’s still viable.

LogRhytms top ten things to watch in phishing emails

I recommend you to think about these tips when you get an email and make sure to always keep the guard up when it comes to emails.

Thanks for reading,
/Rickard

Copyright © 2022