

What is DKIM?
DKIM stands for DomainKeys Identified Mail and is an email autentication method. It helps the receiving mail server to verify whether an email have been sent from an allowed email server or not.
The idea of DKIM is that the senders email servers are signing all outgoing messages with asymmetric encryption. The receiving email servers can then easily verify the email signing with help of the senders public key that are being stored in the sending domains DNS.
If users would need to manually sign messages and manually verify all messages it would be a pain in the ass for them and no one would use it. Nowadays most modern email systems have built-in support for DKIM to make the process smooth and automated.
How to enable DKIM?
The implementation of DKIM is different for different vendors but the idea is the same. The senders generates a asymmetric key pair and signs all outgoing emails. The receiver of the email can use the senders public key to verify that the email were signed by the correct server. Microsofts email cloud service Exchange Online is very popular so I will now describe how you can enable DKIM signing in Microsoft 365.
Enable DKIM signing in Microsoft 365
Microsoft 365 have built-in support for DKIM signing. This guide will show you how easy it is to enable and configure.
- Step one is to browse and login to the following site: https://security.microsoft.com/dkimv2
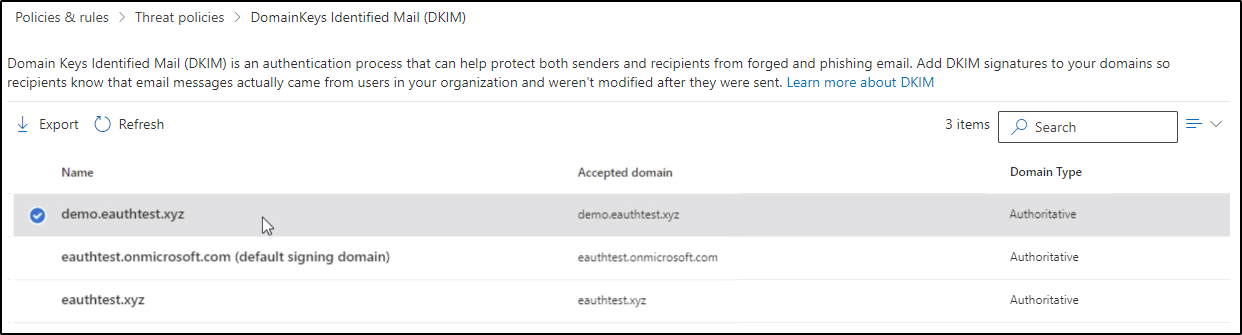
- You will now see an overview of all of your accepted domains of your tenant, click on the domain you want to enable DKIM for:
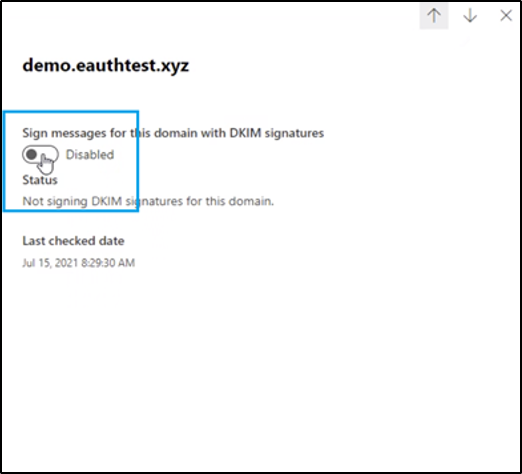
- Press “Sign messages for this domain with DKIM signatures”
- You will now get a pop-up windows which instructs you to create two CNAME post in your DNS. Copy these instructions and login to your DNS provider
- Create and publish the two CNAME posts in you DNS based on the instructions, usually it is by the following format:
- Selector 1
- Name: selector1._domainkey
- Type: CNAME
- Value: selector1-<customDomainIdentifier>._domainkey.<initialDomain>
- Example: selector1-tzusec-com._domainkey.tzusec.onmicrosoft.com
- TTL: 3600
- Selector 2
- Name: selector2._domainkey
- Type: CNAME
- Value: selector2-<customDomainIdentifier>._domainkey.<initialDomain>
- Example: selector2-tzusec-com._domainkey.tzusec.onmicrosoft.com
- TTL: 3600
- Selector 1
- When the post have been published go back to the DKIM page in Microsoft 365 and press “Sign messages for this domain with DKIM signatures” again.
- When Microsoft have verified that the CNAME posts are correct signing will be enabled and you have successfully enabled DKIM signing for all of your outgoing emails, great job!
The next step is to verify that the signing works correctly and you can do that manually by inspecting the headers of an email sent from the email server. I will describe how you can do that in a future blog. Feel free to contact me on twitter if you have any questions.
// Rickard Carlsson