how to use Evilginx2 to grab session tokens and bypass Multi-factor authentication

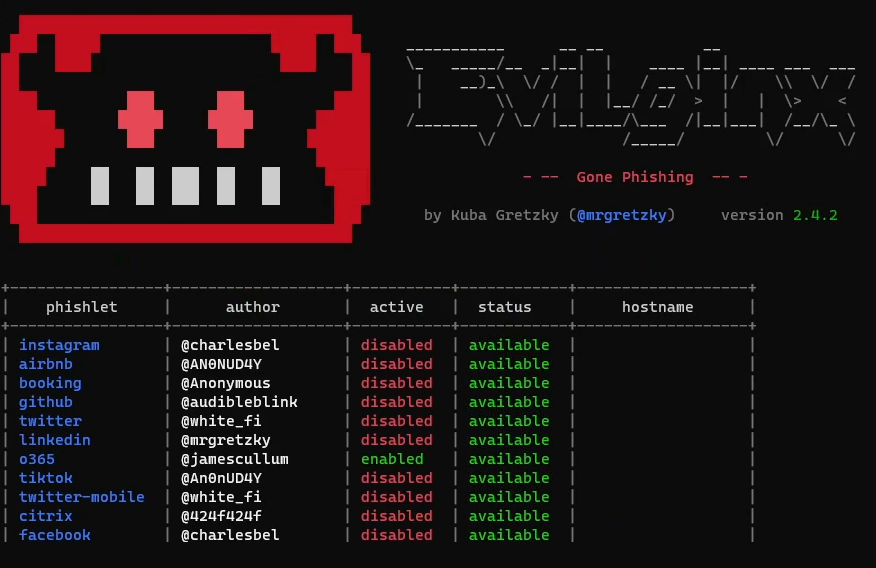
Evilginx2 with o365 phishlet enabled

Today I want to show you a demo that I recorded on how you can use the amazing tool Evilginx2 (by Kuba Gretzky) to bypass Multi-Factor Authentication (MFA). In the demo I used Evilginx on a live Microsoft 365/Office 365 environment but It can be used on almost any site that doesn’t use a more safe MFA solution such as FIDO2 security keys, certificate based authentication or stuff like Windows Hello for Business.

The reason why I recorded the video was to have a video demonstration to show friends and colleagues that keep thinking that MFA is the universal solution to all worlds problems. I want to demonstrate that there are no bulletproof solutions and that we need to think about security everywhere in all layers.

Link to the video:

Like I said in the video the demo was on a Microsoft 365 environment but Evilginx2 works for most sites out there. It works on all Microsoft 365 environments by default but it can be prevented with Microsofts security feature Conditional Access. To prevent it you can for example configure your environment to only allow logins from enrolled/domain joined devices. I highly recommend you doing that.

The tool is easy to install, just follow the installation instructions in the github project. You may have to do some modifications to the .yaml-files for the phishlets since companies like Microsoft make some changes from time to time. I had to do it for this demo and if you have to do it I recommend you to just analyze the login process step-by-step with a tool like Burp Suite to check which cookies you need to grab and so on. There is a great wiki-page in the Github project so you can see how you should configure your phishlets. Thanks

You should of course not use Evilginx2 anywhere without permission since that is illegal in most countries. Only use it in locked down demo environments or in penetration testing scenarios where you have written permission from the client.

If you have any questions, feel free to contact me on twitter @tzusec.

// Rickard Carlsson

How to Install Terraform in Linux

Terraform is an open-source software tool for Infrastructure as Code (IaC). The tool helps users to define and provision a cloud infrastructure with code. This guide will guide you on how to install Terraform on Linux.

You can either install Terraform from pre-compiled binary or you can also compile it from source and that this guide will help you with installing it from source.

The first step is to clone Terraforms repository from github. I prefer to install all my tools to /opt so thats what I do here but you can download to the location you want.

cd /opt
git clone https://github.com/hashicorp/terraform.git

Next we need to move into the terraform folder and compile the binary, to do this you will need to have golang installed, if you don’t have it already you can follow my guide on how to install Golang.

cd terraform
go install

The last step that I recommend you to do is to make sure that terraform is available in your PATH environmental variable.

First check view your PATH with

echo $PATH

Now we just need to move the terraform binary to one of the locations, I choose /usr/local/bin

mv /opt/terraform /usr/local/bin/

Now you have terraform installed. You can verify that is correctly installed by running:

terraform -help 
#or
terraform -version

The last thing I will recommend you to do is to enable tab completion so you can auto complete your terraform commands. You can do it by running the following command.

terraform -install-autocomplete

That’s it. Now you are ready to use this awesome IaC-tool. If you are interested in taking the Terraform Associate certification I recommend you to read my review of the exam.

If you have any questions you can contact me on twitter (@tzusec).
// Rickard

Httprobe

This post is about httprobe which is a tool for quickly probing for active http and https servers. If you have a list with subdomains you can quickly check which are active by using this tool. Httprobe is available on Github and the tool was created by Tom Hudson (@tomnomnom on Twitter).

Pre requisites:
1. You need to have Golang installed. If you haven’t used golang before and need help to get started, read my guide on how to install Golang on Kali Linux

2. Download ‘httprobe’ by running
go get -u github.com/tomnomnom/httprobe

3. If you used my guide to install Go you can now find ‘httprobe’ at:
/root/go-workspace/bin/assetfinder

Basic usage:
To use httprobe you need to print out your domains and pipe them to httprobe. In the example below we are are using cat to read the data from domains.txt and gives its content as output to httprobe.
cat domains.txt | httprobe

Adding extra ports:
By default httprobe is probing for http on port 80 and https on port 443. We can add other ports by using the ‘-p’ parameter.
cat domains.txt | httprobe -p http:8080 -p https:8443

Skip default ports and only probe for defined ports:
By adding ‘-s’ parameter the default ports will be ignored.
cat domains.txt | httprobe -s -p http:8080 -p https:8443

Specify a timeout:
If you know that the response time on the target server might be high you can specify a custom timeout by using the ‘-t’ parameter. The time is configured in milliseconds.
cat domains.txt | httprobe -t 10000

Combine with other tools:
You can combine ‘httprobe’ with other tools such as ‘assetfinder’. If you don’t know about assetfinder you can read my earlier post that helps you getting started with assetfinder.

One example on how you can chain assetfinder with httprobe.
assetfinder --subs-only yahoo.com | httprobe -s -p http:80
In the example we first searched for subdomains at yahoo.com and piped the result to httprobe to find out which of the subdomains that were listening on port 80.
assetfinder+httprobe

Assetfinder

reconnaissance

In this post I will write a bit about Assetfinder which is an quick and awesome tool for finding subdomains. The tool is available in Github and was created by Tom Hudson (@tomnomnom on Twitter).

According to the information on Github, Assetfinder uses the following resources to find subdomains

  • crt.sh
  • certspotter
  • hackertarget
  • threatcrowd
  • wayback machine
  • dns.bufferover.run
  • facebook
  • virustotal
  • findsubdomains

Pre requisites:
1. You need to have Golang installed. If you haven’t used golang before and need help to get started, read my guide on how to install Golang on Kali Linux

2. Download assetfinder by running the following command.
go get -u github.com/tomnomnom/assetfinder

3. If you used my guide to install Go you can now find assetfinder at:
/root/go-workspace/bin/assetfinder

How to use Assetfinder:
Navigate to assetfinder and run
./assetfinder exampledomain.com
If you only want the subdomains you can add –subs-only.
./assetfinder --subs-only exampledomain.com

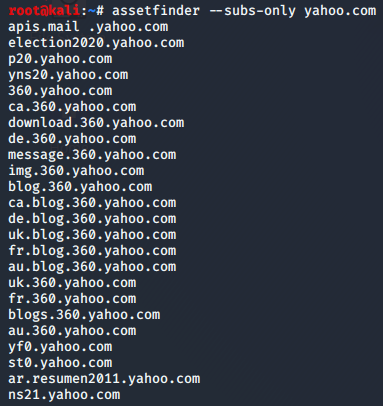
assetfinder --subs-only
Save the output to a file:
You can also save the output to a file by adding “> filename”
./assetfinder --subs-only exampledomain.com > domains

Assetfinder - Save output

The tool is really quick so it is perfect to use it when you want a fast way to find subdomains for a target company. I really love this tool. <3

Copyright © 2022